So I’ve had mine for a couple of months, and it’s now only just over a week until the Brother Scan N Cut machines start shipping from Create and Craft TV so I thought that I would try and do a post per day this week to try and bring you up to speed with all of the things that I have tried, tested and discovered since I have had more time to work with it and to hopefully give you a head start for when yours arrives.
Most of the things that I will cover in this series of posts will also go on to cover a lot of the questions that you have sent to me via Facebook, Twitter and also this blog (thank you for all of those – you have kept me very busy indeed!)
First up I should say that I will be covering Working With Fabric and also The Brother Canvas design suite in more depth in separate posts later in the week, so if these interest you, please don’t forget to subscribe to this blog for email updates of when these posts are released.
Anyway, lets make a start …
Q: How Intricately Can The Machine Cut?
There are going to be a number of variables here.
- Complexity of design.
- Strength of medium being cut.
- Line Weight.
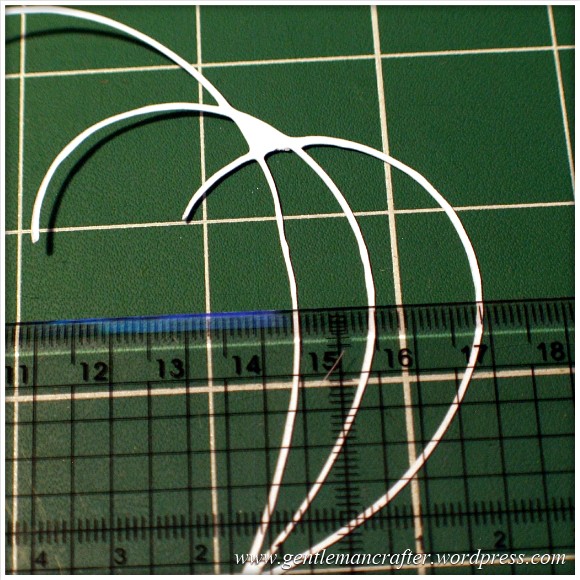
I decided to do quite a basic test for this post. I drew a few curved lines with an 0.5mm Pigma Micron pen and then used the Scan To Cut Data option.
I used a lightweight cardstock to test the cut.
This is the result.
I did increase the size of the scan by about double in this test so the lines that were cut were approx 1mm thick as you can see here.

The machine even picked up the varying line thickness of the ink against the textured paper which I think was quite cool.
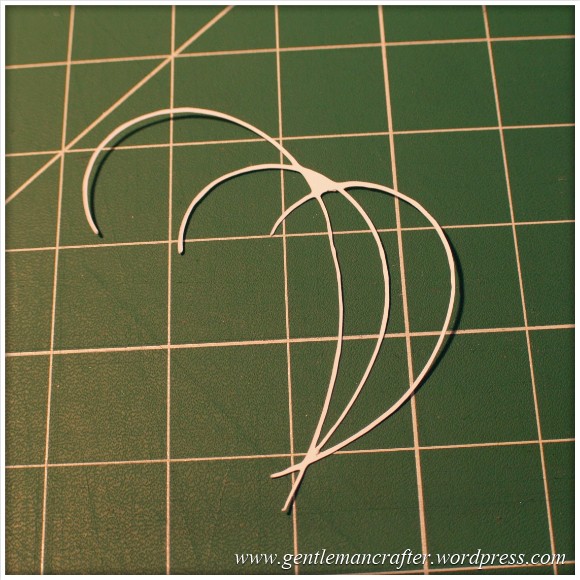
Anyway, here are the two side by side.

Conclusion: Not a bad result. I would however recommend starting bigger and decreasing the image rather than starting with a small image.
Also, unless ‘freehand’ is the look that you are going for, you will want to be fairly precise and use a ruler, french curve or other guide against which to draw your lines when hand drawing the design.
I used the standard mat as I was using cardstock. You will need to be very careful when removing intricate designs from the mat in order to prevent them from tearing – or perhaps do your design so that there are lots of overlapping lines so that there is more ‘structure’ to the overall design.
Q: Do I always have to stamp or print in black?
No. You can use most colours as long as there is a good contrast between the colour and the paper against which it is printed. Here is an example where I used four different colours to stamp a flower.
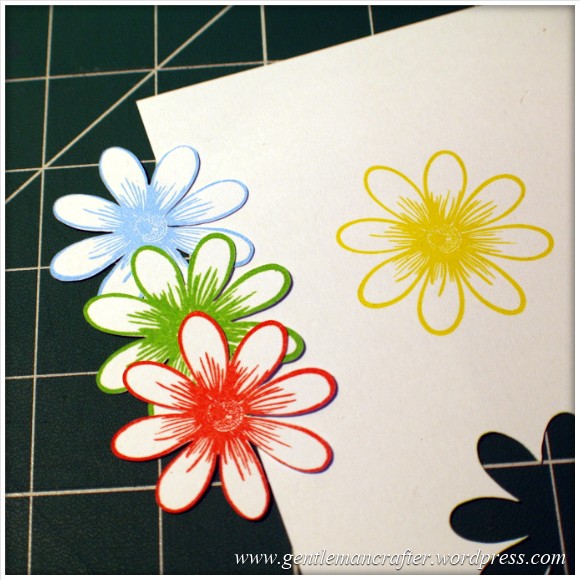
As you can see, the machine picked up three of the colours very well but sadly did not recognize the yellow as there wasn’t enough contrast between it and the paper (in all fairness, this image makes it look a lot brighter than it is in real life – even I was having trouble recognizing it with my eyes).
Conclusion: You don’t have to always print or stamp in black but should consider using ‘bolder’ colours to create the outlines for things that you wish to scan and cut.
Q: Do I have to colour my stamped images in after I have cut them or can I colour them before using the Direct Cut feature?
You can do either, but will need to remember the point above about having a good contrasting outline for the machine to recognize.
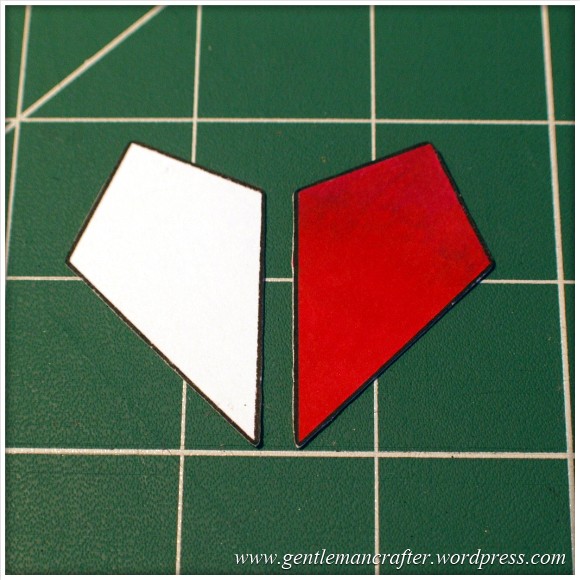
Here is the test that I did. One of the kite shapes was coloured (with a graduation of reds from my Spectrum Noir pen set) and the other was left blank.
I also did the Direct Cut process on these shapes at the same time (i.e. I didn’t do one sheet coloured and then one plain).
One point though, you will need to be a tidy colourer if you are going to colour before cutting. You can see in the next image how I went over the line and the machine thought that this was part of the outline.
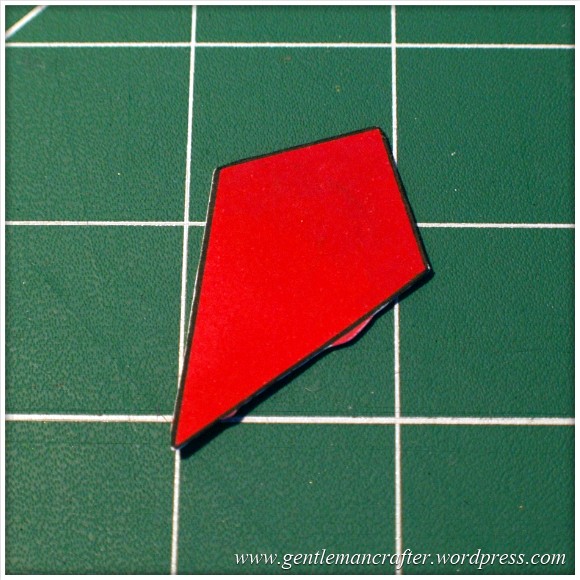
Conclusion: It should not matter if you are colouring before or after the cutting process takes place as long as you have a nice solid outline to the image for the machine to recognize – but stay inside the lines if you plan to colour first! (Lol, flashback to colouring as a child then…)
Q: Can I Use The Direct Cut Feature To Cut Out A Stamped Image That Has Been Heat Embossed?
Yes* (I put the asterisk thing here for two reasons, one, I have only tried it twice and it may depend on a number of things).
The first time that I tried it I used black embossing powder and there were a few flecks out of place. This test did not work.
The second test that I did I used clear powder over a coloured impression. This one work perfectly as you can see here …

Conclusion: I haven’t really done enough testing to give it a 100% tick but initial results look good and testing will be ongoing and I will report back on more results in the near future.
Q: Can I Use A4 Cardstock And Scraps Of Paper And Card?
Yes. Just use the scan preview feature on the cutting mat screen to see where they are on your mat and then you can position your shapes precisely where they need to be – as shown in this image (which could be better – I really need to figure out a way to photograph this screen better).

Q: What Things Will The Machine Cut?
Oy! This list could go on forever! Ok, here are a few that I have tested and seen to work.
- Copy Paper, Vellum, Parchment
- Light (160gsm), Medium (220gsm) and Heavy (350gsm) Cardstock
- Mirror Card, Pearlescent Card, Satin Card
- Crafters Chipboard
- 100% Quilting Cotton Fabric
- Felt (with a fused backing applied)
- Lightweight Faux Leather
- Oil Cloth
- Denim
- Thin Magnetic Sheet (like the kind you print onto to make family photo fridge magnets)
- Shrink Plastic
- Doeflex Template Plastic
- Modelling Sheet (A thin plastic sheet that is maleable when heated).
- Acetate
- Project Acetate
- Craft Metal
Phew, and that’s just a few things!
Conclusion: It’s VERY versatile and will work with you no matter what craft you are into.
Q: Can I Export A Design That I Have Scanned Into The Machine And Then Edit The Lines In The Canvas Design Suite?
Yes. You can see the example below of the scanned image that I used earlier to test intricacy loaded up into the Canvas design suite and the line editing tools selected.

Q: Can the Brother Scan N Cut cut out sheets of printed decoupage?
Probably one of the most frequent questions that I have had.
Tests have been inconclusive. Whilst theoretically possible, it is proving more complex in practice.
As the machine recognizes outlines via contrast between areas of a page, when you have a complex design with multi tonal areas (i.e. a countryside scene or flower) the machine will always do it’s best to find as much as possible but doesn’t always detect the entire outline. In addition, as we would only really want to use the direct cut function, this would not recognise landlocked areas.
There is potentially a way by using an acetate overlay that you can give the machine a helping hand to recognize the overall outline, but again, not sure it would work with landlocked areas. You can see the process I mean by watching this video.
I don’t for a minute believe that it is a fault of the machine, as it has been doing exactly what it was designed to do which was recognize areas of contrast. Instead I think that this might just be a dream featured that has been transposed onto it by our combined desire not to have to cut out all of those fiddly bits.
Conclusion: Tests still ongoing.
Now for some quickfire questions.
Q: Can I ‘Direct Cut’ Multiple Stamped Images In One Operation?
Yes.
Q: Can I Cut A Shape Within A Shape To Create An Aperture?
Yes. Just position them one on top of the other in the design screen on the machine and cut as normal.
Q: Can I Weld A Word Into An ‘Aperture’ So That The Word ‘Hangs’ In The Aperture?
Yes, but you will need to do this in Canvas Workspace and will first need to “subtract” one shape from another to form a frame with an aperture in it before attempting to weld a word into a frame.
Coming Up…
Ok, That pretty much concludes this ‘test lab’. There is clearly much to explore with this machine so I will be doing more in the Test Lab series in the future.
Here are just some of the questions that I have not yet tested but will be looking at in the future …
- Scanning Multi Coloured images
- Direct Cutting With “Busy” images
- Direct Cutting with light ink on dark card
- Can I Cut ‘One Stroke’ Paintings
- 3D creations
- Will it cut foiled designs
- Is there a score/perforate feature?
- Can I cut Zentangle designs?
- What is the test cut button for?
- Can I cut swing cards?
- Is it possible to cut boxes?
I also have other posts planned for this week that will cover using fabric and using the Brother Canvas design suite.
Right, well thanks for reading and I hope that it has helped you in some way.
Look out for more on the Brother Scan N Cut this week.
As ever, if there are any questions that you would like me to add to the list then please feel free to use the comments section below.
John :)

I need to cut a shape from a sheet that is 8.5″ x 14″. The cutting area fits on the holder but the end would hang off the back. Will this work?
LikeLike
I am not 100% sure if this would work. What I do know is that the recognition marks for the mat are on the top edge (that leads into the machine) and that all other marks are used for various scanning functions so, it might be possible as long as the “extra bit” was hanging off the end that is last to feed into the machine. If not, you can use a 12×24 mat.
LikeLike
RE: Can I Use The Direct Cut Feature To Cut Out A Stamped Image That Has Been Heat Embossed?
Did you change any settings in the machine to make cutting out heat embossed images work?
Thank you!
K
LikeLike
No. No changes for me but this will depend on the thickness of your embossing to a degree.
LikeLike
Hi John
Seasons greetings ;)
Some advice please if poss.
Will this cut shrink plastic cleanly?
My main use for buying this will be for creating jewellery from shrink plastic and leather.
Also fabric felties decorations and purses, how fiddley is this machine to use ? I have watched some videos and the user is constantly having to test and change the cutting depths etc.
I want something that’s quick and easy to use I like the look of using own images being an old art student but worried that I will get fed up or not have the time to get it right if that make sense?
Thanks Karen
LikeLike
It will cut shrink plastic. You may need the deep cut blade for this though.
Basic operation is simple and quick.
The speed at which you work and learn will of course depend on you and your experience so i can’t really advise there.
Hope this helps :)
LikeLike
john,firstly thank you for the hard work and time you spend on trying to make life with the scan and cut easier for us.i have looked through the lab and cannot find an answer,so yet again so hope you do not mind answering my question,sometimes when I scan a item in that I have cut using the tattered lace dies in black card,some of the tiny areas don’t show up,i know that it has been shown on create and craft how to do this,but cannot find it in the lessons there either,i know you have to alter settings but not sure which one.i had ordered the scan and cut at the latter end of the monster deal,but did not record everything,is there likely to be a nother programme on create and craft selling the scan and cut.
many thanks
susannah
LikeLike
There have been several over the weekend and there will be more.
In relation to your query the option you are looking for is called ‘delete size’ and I believe that it comes up just after the scan has completed (before you hit ok).
Hope this helps :)
LikeLike
Very helpful indeed. You’ve put a lot of hard work for us users. Thankyou
LikeLike
Hello John.
Firstly thank you for all your hardwork and time that you spend helping others with the scan n cut.
I am not the brghtest bulb when it comes to the puter jargon etc. I took delivery of my snc just over 1 week ago. I set it p within minutes and started to play, (just as Mel said) then I hit my first problem. My USB was not compatable ARGH!!! on ebay got one within 2 days. Then I tried to register with canvas more ARGS says my browser not compatable . long story short spent 5 days !!! trying to get this sorted and finally I am sorted phew xx
So far have used the machine to practice cutting, results have been brilliant. I listened to Mel with regards to the blade depth and pressure fiddled about with this and got it right. Then I cut my first fabric yesterday using the bonding stuff and what a beautiful result. I am having trouble using files from the site pinterest I may have got holf of the wrong end of the stick but I was under the impression that these could be used, nope not getting any results, can you help. Also can you suggest any sites with free use that I can use swirls and lacy stuff .I dont have many resources for this and need the internet
Sorry for long mail
with kind regards
Kim
LikeLike
Hi Kim. You will need to look for SVG, FCM or JPG files. FCM files can be used directly with your machine. SVG and JPG will need converting in canvas first.
There is a tutorial in this blog for that.
Hope this helps.
J :)
LikeLike